Arch Linux Btrfs with hibernation in a swapfile
2023-03-09
The Arch Wiki technically contains everything needed to make this work, but
it isn't the best organized and not obvious how it should be done. Here I
document the process I took to make it work on two different PCs.
This post expects you to already know how to use the Linux command line.
If you need to see the images larger, simply zoom the page, or right-click and
open the image in a new tab and zoom there.
Feel free to skip around as needed.
Preparing for Installation
Head over to archlinux.org and get an ISO of Arch and write it to a USB or DVD,
if that's your style (it's too big for CD nowadays!). A tool like balenaEtcher
is user friendly, and I use it often. Of course dd works well, too, but it is
much easier to screw up and overwrite your data using it if done carelessly.
I suppose one could use cat as well, with a redirect:
cat arch.iso > /dev/sdX, where X is the appropriate drive. Still, cat is
dangerous like dd.
Get it booted up, be it UEFI or BIOS mode, and check to make sure the network
works. It's possible to do it with WiFi, but I prefer wired for setup.
Run # ip a and ensure you have an appropriate IP address and ping google.com
or some other known, good address.
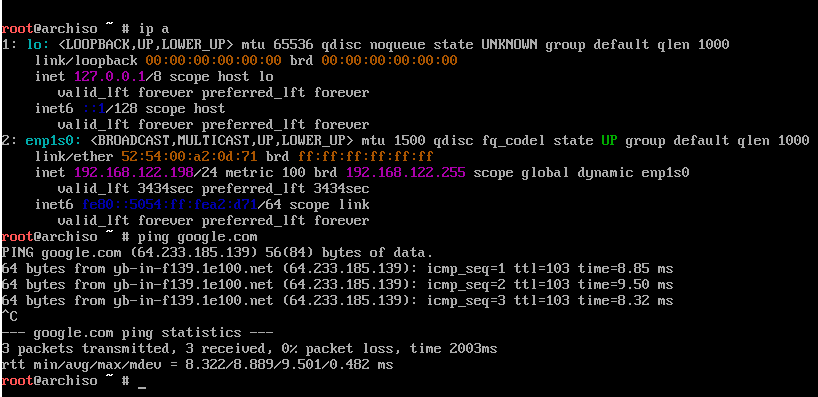
Now, if the connection is working, the process can continue.
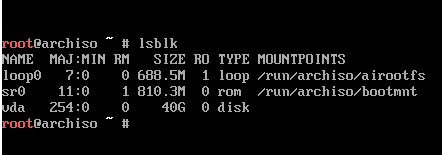
Run # lsblk and obtain the correct drive path.
In my case, it's /dev/vda but on a real machine, it's like /dev/sda.
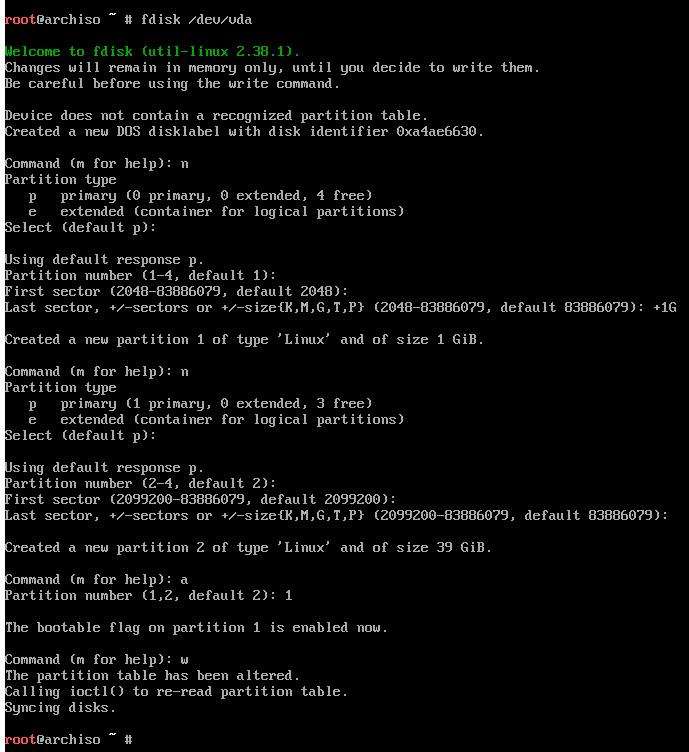
Either fdisk or gdisk can be used, whether using BIOS or UEFI, respectively.
These instructions are assuming a blank disk.
Since I'm using BIOS boot, I'll be using MBR instead of GPT, electing for fdisk.
I create the very first partition of 1 GiB for /boot, which will be formatted
as ext4; however, if GPT and UEFI is being used, it must be formatted as FAT32,
with type of EF00. Here, I leave the MBR type the default 0x83 for Linux.
I create the second partition which will be LUKS encrypted and formatted Btrfs.
It's also default type 0x83. I also marked the first partition as active.
Make sure you're partitioning the correct drive!
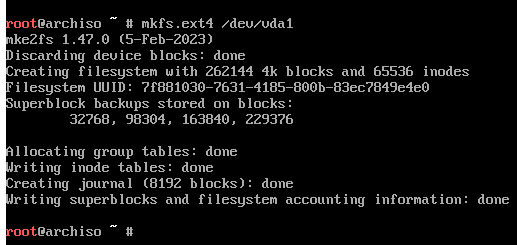
Once partitioning is done, the partitions must be formatted.
While the boot partition can be encrypted, frankly it's easier if it's not.
Here, since I'm using MBR, I can format as ext4 with
# mkfs.ext4 /dev/vda1, where vda1 corresponds to my 1st partition.
However with UEFI, it must be FAT32, # mkfs.fat -F32 /dev/vda1.
The UEFI spec calls for 32-bit FAT, which is why it is forced with -F 32.
Now that's done, I want to encrypt my main partition.
This isn't necessary for the rest of this post to work, but commands would be
adjusted accordingly.
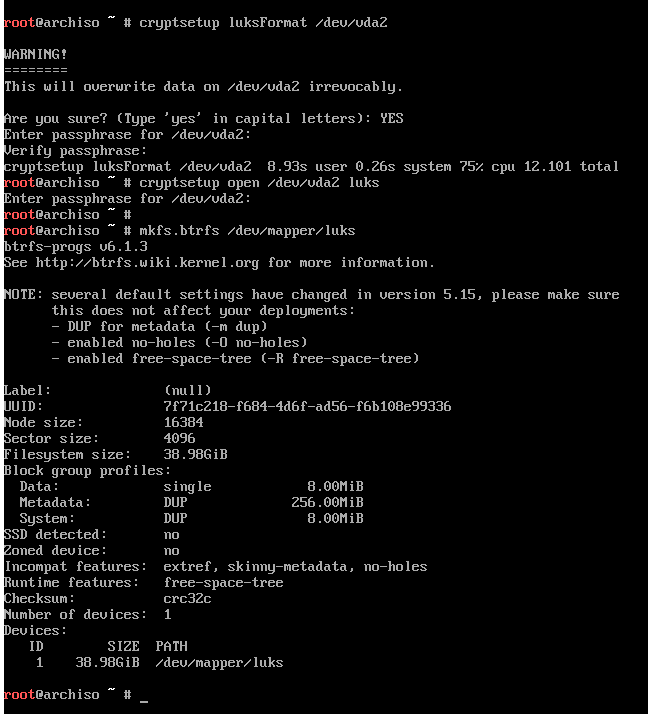
# cryptsetup luksFormat /dev/vda2, where again, vda2 is replaced with your
appropriate partition and supply the new encryption password.
After the LUKS encryption is done, it needs to be opened:
# cryptsetup open /dev/vda2 luks, the luks at the end can be anything. It's
just what the mapping will be called, in this case /dev/mapper/luks.
Once the partition is authenticated, it can be formatted as Btrfs:
# mkfs.btrfs /dev/mapper/luks.
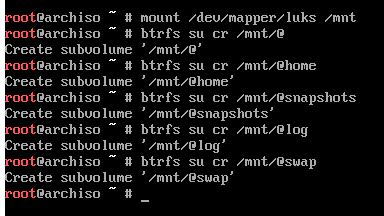
It's time to create the Btrfs subvolumes.
I mount the new partition to /mnt:
# mount /dev/mapper/luks /mnt.
Here I created the following: @, @home, @log, @snapshots, @swap.
The @ subvolume will just be the root /, and the others mounted within that.
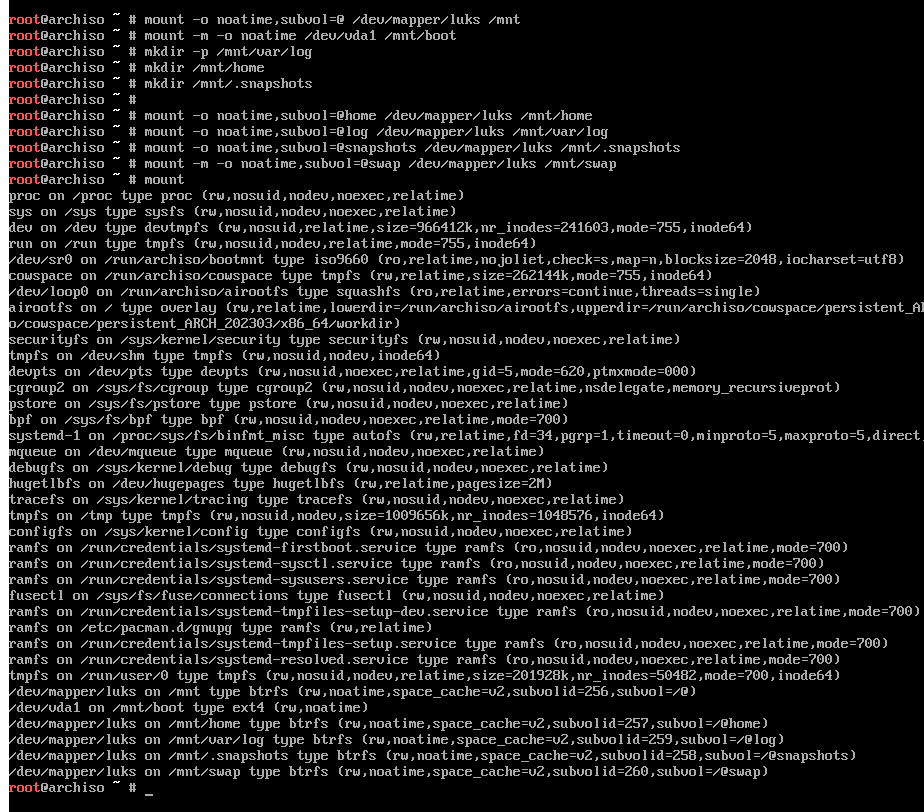
Now it must be remounted to have the subvolumes mounted in the correct place.
First the current should be unmounted: # umount /mnt.
Now, mounting the root subvolume @ to /mnt with the following:
# mount -o noatime,subvol=@ /dev/mapper/luks /mnt. The mount option noatime
is chosen to reduce the overhead of keeping access times for every file.
After the root is mounted, the new mount points needs to be made, whether with
the -m option with mount or manually with mkdir. Both options are shown here.
After mounting, I run mount again to ensure they mounted with the proper
options at the expected mount point, just to be safe.
Installing Arch (finally)
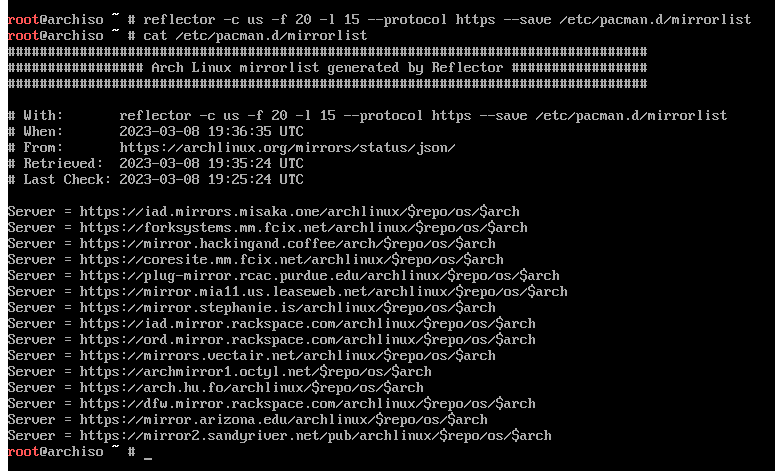
While this step is optional, it doesn't hurt to generate a new mirrorlist
that works best for your location. It will be copied to the system during the
installation process. I recommend reading reflector's man page.
Finally time to install Arch!
At the minimum you'll need base and linux packages. However, I added packages
that make my life easier further in the installation.
# pacstrap -K /mnt base base-devel linux linux-firmware screen neovim dhclient
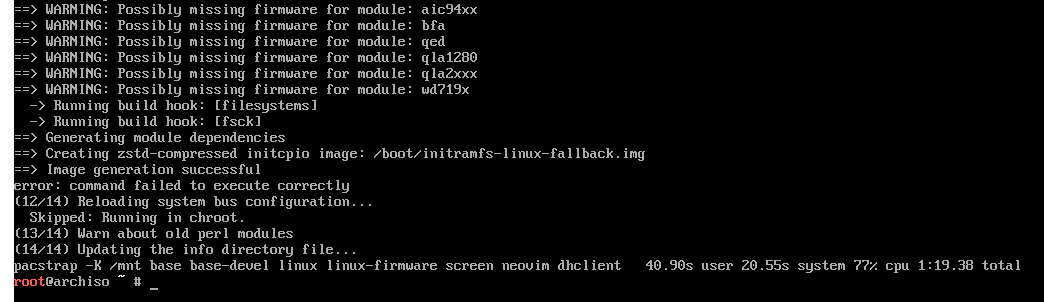
Arch is technically installed now
But it's in a completely useless state without being able to boot itself.
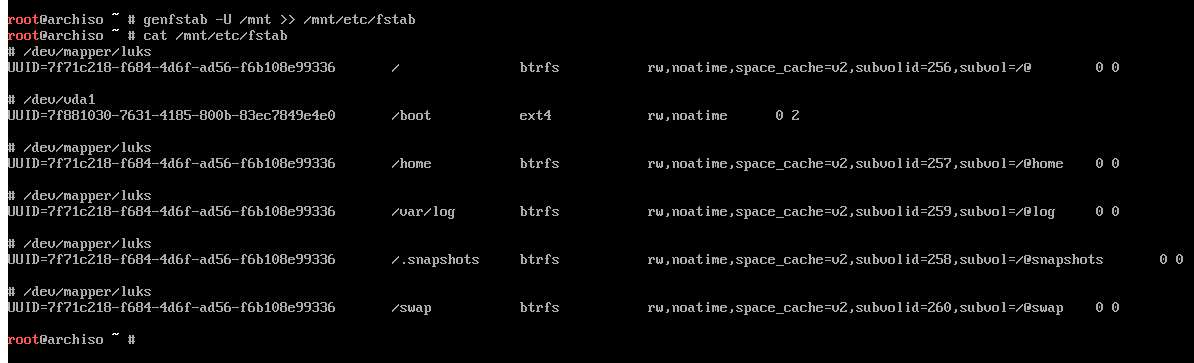
We need to generate a fstab for the new installation:
# genfstab -U /mnt >> /mnt/etc/fstab.
It should autodetect if it's on an SSD, but if not, it can be added to the
mount options afterwards.
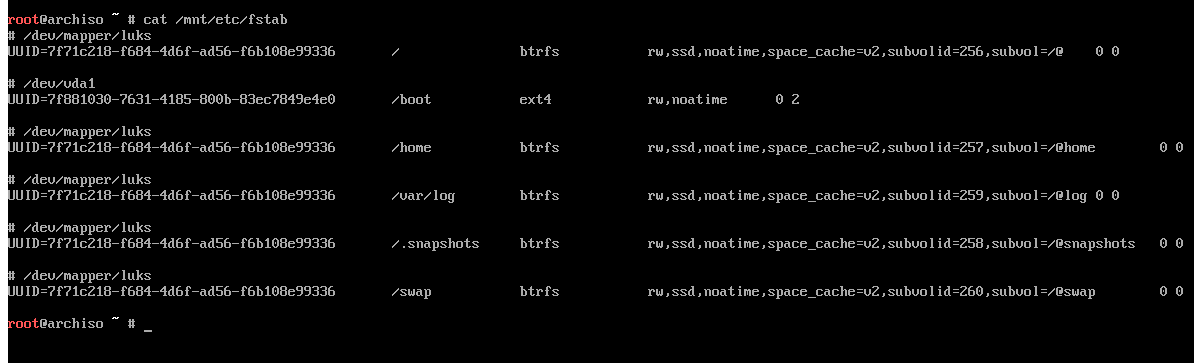
After it is generated, check that it looks okay.
And I ended up adding ssd to my btrfs mount options using vim, as shown.
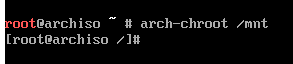
Time to chroot!
We're going to change root to the new installation as if we were booted to it.
# arch-chroot /mnt
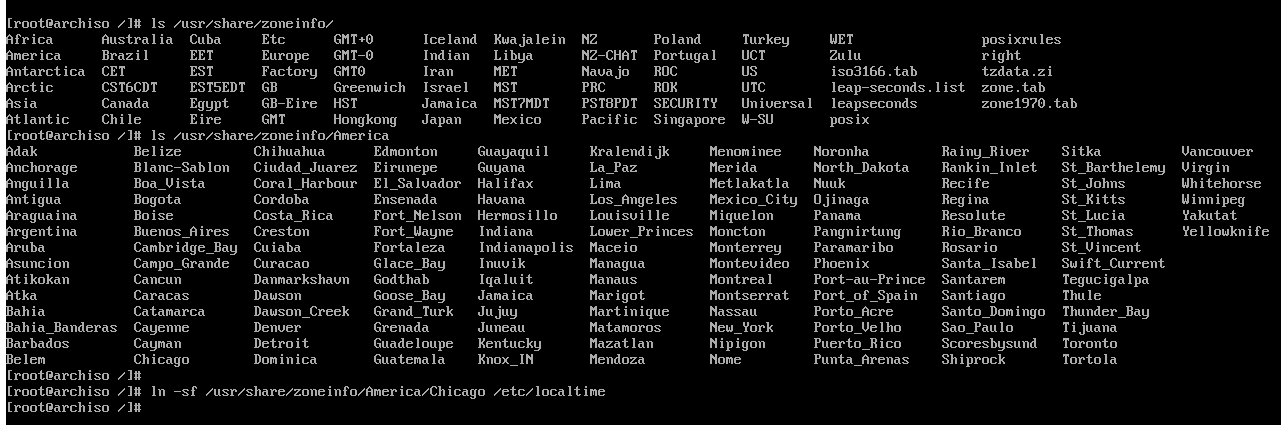
Setting the timezone.
You can ls to find the appropriate region if you don't know already. While
I'm in Tennessee as of posting, I'm in Central time: America/Chicago.
I created a symlink to /etc/localtime as directed by the installation guide.
# ln -sf /usr/share/zoneinfo/America/Chicago /etc/localtime afterwards I run
# hwclock --systohc to sync the time to the CMOS of the system.
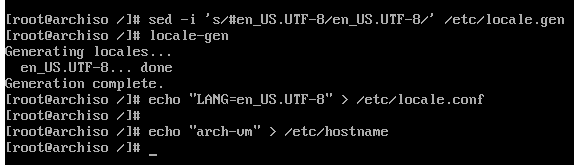
Setting the default language and hostname
This is fairly self-explanatory, although sed isn't necessary to uncomment
your respective locale. That said, if you would rather use a text editor like
nano it needs to be installed with pacman first, since I installed neovim in
my example here.
mkinitcpio.conf
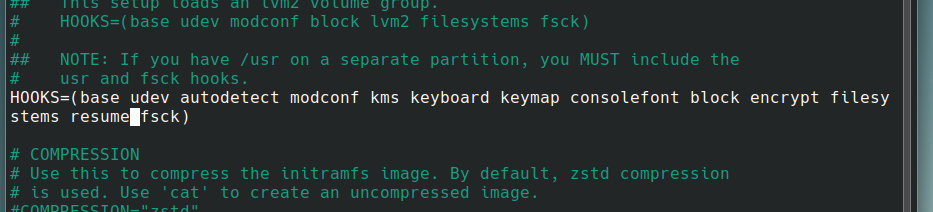
The init ramdisk needs to be configured to know how to decrypt the partition.
Add encrypt before filesystems and after block in the HOOKS about half-
way down the config file, using your editor of choice: I use neovim.
Note: That is not an underscore (it was my cursor) between encrypt
and filesystems, simply a space.
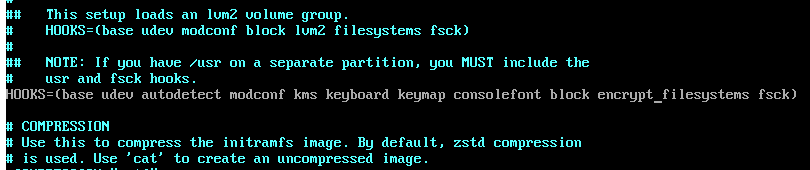
After mkinitcpio.conf is edited, run # mkinitcpio -P to generate the new initrd.
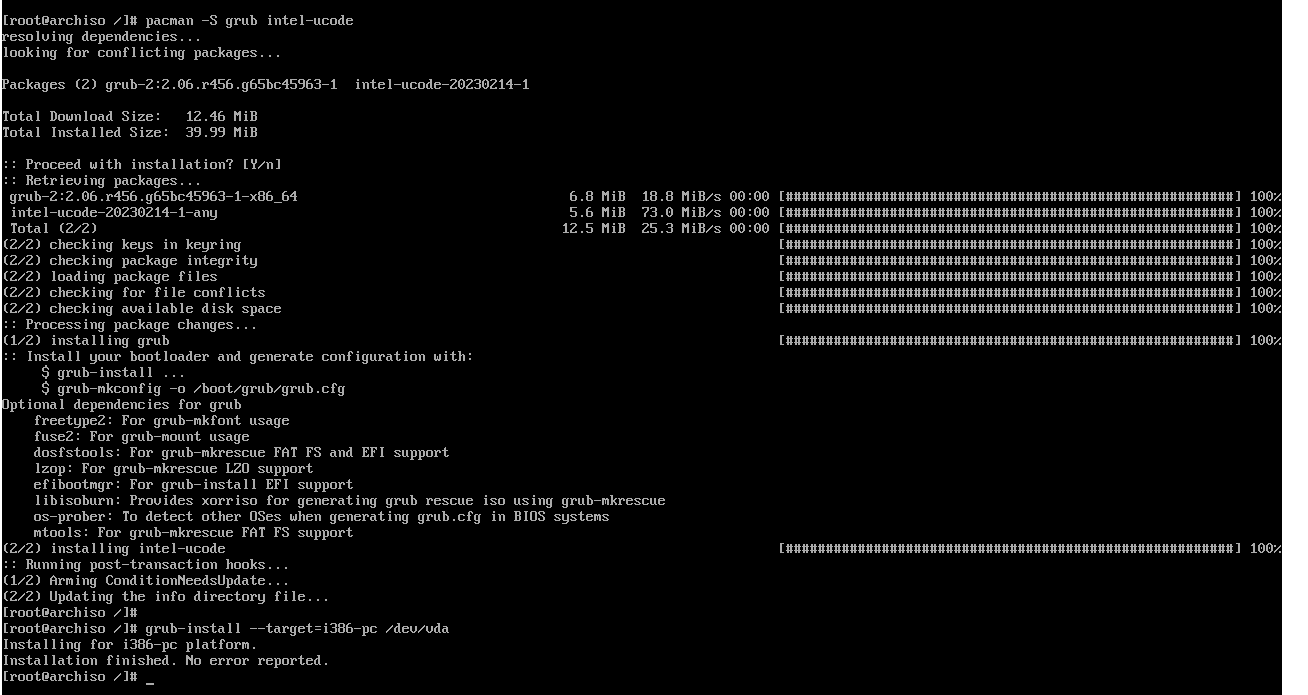
Setting up GRUB
Note: Keep in mind we're still in the arch-chroot!
It's best to read the Arch Wiki for GRUB beforehand, in case your setup is different, i.e., UEFI.
The GRUB package needs to be downloaded first, along with CPU microcode, if you
prefer (intel-ucode or amd-ucode). I recommend including the respective one.
# pacman -S grub intel-ucode
GRUB will find the microcode image and include it automatically.
Here, since my boot drive is still /dev/vda, that's where I'll install GRUB.
# grub-install --target=i386-pc /dev/vda,
where i386-pc means a BIOS/MBR system. For UEFI, it's x86_64-efi with the EFI
partition mount point supplied. Check the wiki as mentioned.
Setting GRUB to boot encrypted partitions
Before the grub.cfg is created, some kernel boot parameters need to be specified
in /etc/default/grub.
First the UUID for the root partition (not the mapped partition!) needs to be saved. It may be easier to do
all of this in an SSH session from another PC. The SSH daemon probably needs
starting: # systemctl start sshd. In that case, using a multiplexer like GNU screen (which I had installed during pacstrap) is probably a good idea in the event the connection is dropped. Otherwise, continue forward.
While some mega-cool regex stuff could probably be done, I'd spend more time
trying to figure that out than just appending the UUID to the end of the config
and then just moving it inside the text editor later. In that case, I did the
following: # blkid -o value /dev/vda2 | head -n1 | tee -a /etc/default/grub.

Afterwards, I used neovim to move the UUID into the kernel boot arguments.
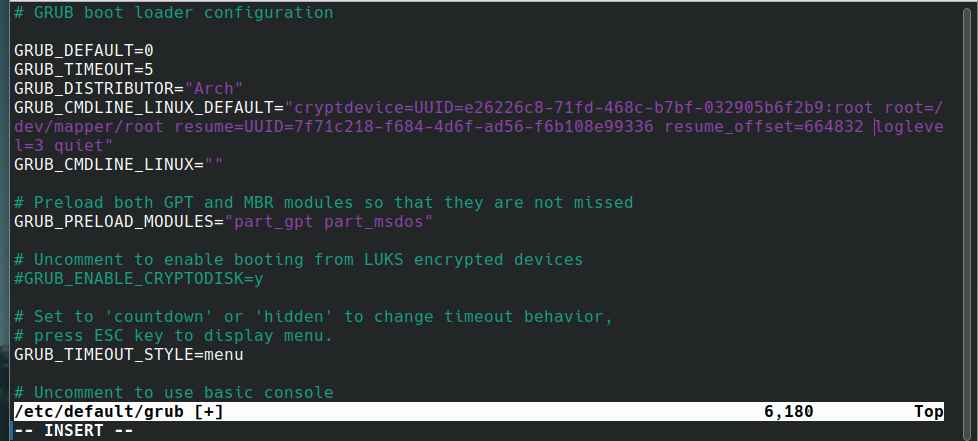
The following is needed:
cryptdevice=UUID=<your UUID here>:root root=/dev/mapper/root

Once the grub config is edited appropriately, run # grub-mkconfig -o /boot/grub/grub.cfg.
Creating the swap file
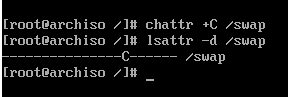
Before we forget, we need to disable Btrfs COW for the swap subvolume. This can
be achieved by adding the +C attribute to the mount directory.
# chattr +C /swap
This can be verified with # lsattr -d /swap as shown in the picture.
Luckily newer versions of Btrfs can generate the swap file for us.
However we need btrfs-progs: # pacman -S btrfs-progs. Then run,
# btrfs filesystem mkswapfile --size <your ram size>G /swap/swapfile
If you're confused about needing btrfs-progs, it's because we're in chroot. The
ISO of Arch has btrfs-progs included, but we're in the installed system's environment.
If you intend to hibernate, I recommend the swap size being at least equal
to that of your memory. Since my VM here has 2GiB of RAM, my swap will be 2G.
Afterwards I need to append the new swap file to the fstab so the system will
automatically use it. # echo "/swap/swapfile none swap defaults 0 0" | tee -a /etc/fstab
I made a typo in the image, 'default' should be 'defaults'.
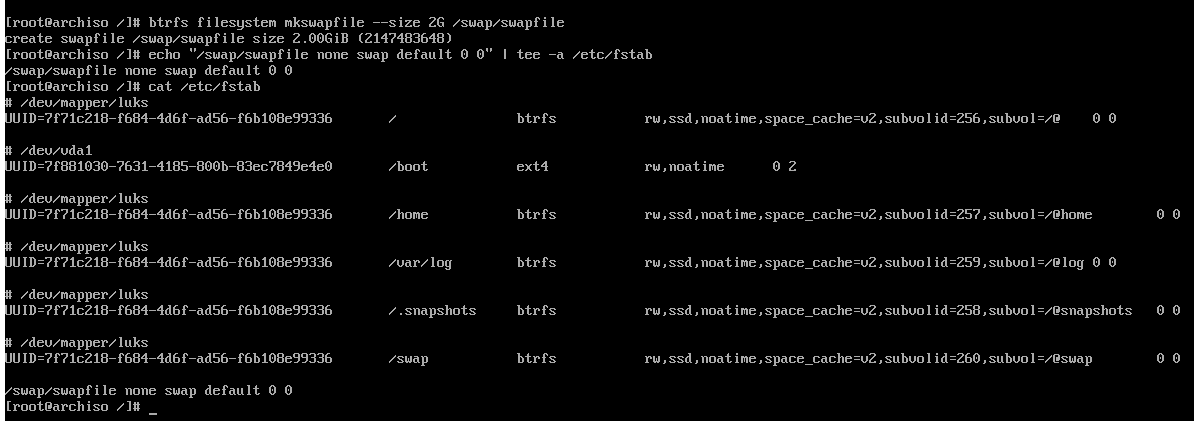
Piping to tee (with -a so we don't overwrite!) just allows me to ensure the
edited fstab is correct. Well, mine would be without the typo. Just pretend mine
is right!
Finally ready to reboot!
Maybe not quite ready. We still need to exit chroot and unmount partitions.
Simply # exit from chroot then unmount everything: # umount -R /mnt.
If no errors occurred when unmounting, it's safe to # reboot or # poweroff.
Note: Be sure to remove installation media after the reboot.
If all is well, the GRUB menu should load and start the kernel automatically,
landing you at the prompt to enter your LUKS password created a while ago.
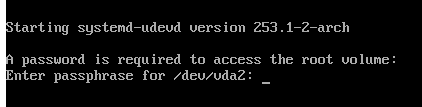
Characters will not echo to the screen.
First login to a base system
Login as root. And run # dhclient to get an IP address.

Welcome to Arch Linux! It's not very convenient without a GUI, though.
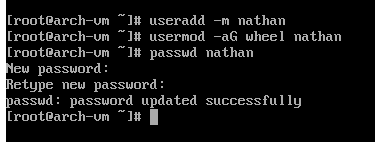
Before that, I need to create a normal user and give it sudo privileges.
I decided giving the user the group wheel is the best, given it allows
for many other things. Use your editor of choice by adjusting the EDITOR variable.
I use neovim, so ran visudo with the following: # EDITOR=nvim visudo.
Uncomment the %wheel line as shown in the picture.
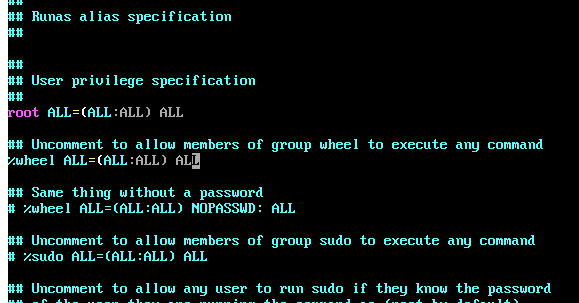
Save and close the editor.
Create the new user: # useradd -m <username>, where -m generates a home dir.
Afterwards, assign a login password for the new user: # passwd <username>.
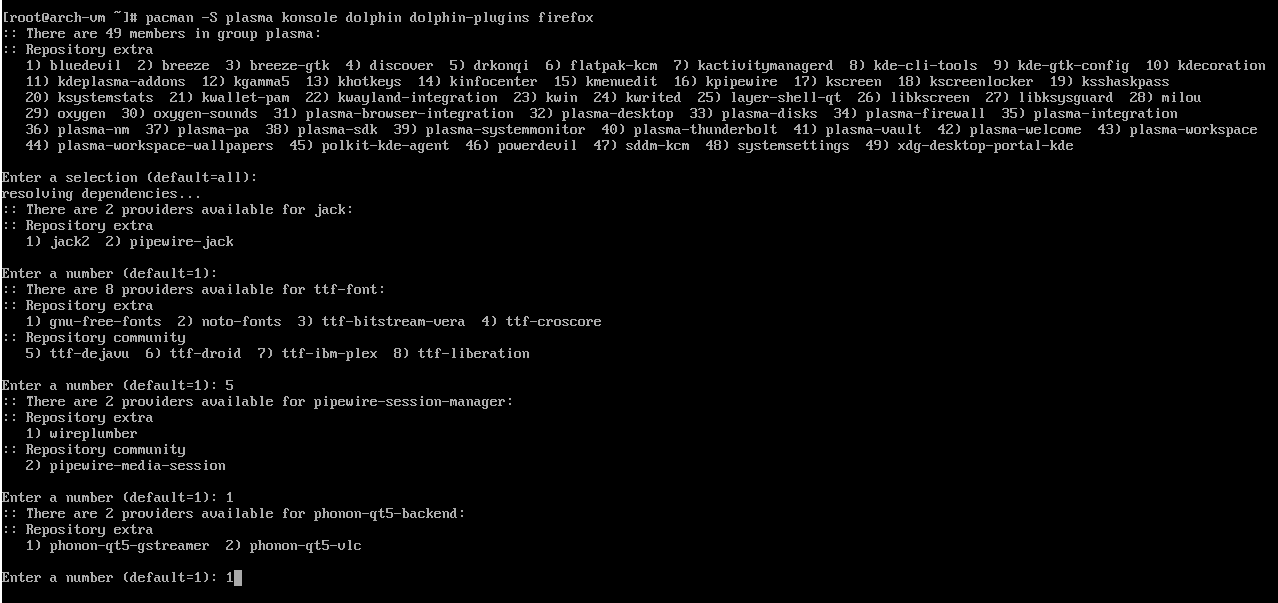
Installing the desktop environment
I'm choosing KDE here given how feature rich it is, but which DE to use is your choice.
I elected to do a base KDE Plasma install with some necessities just for example.
Having a terminal emulator is important, so I chose the default KDE Konsole and
Firefox for my web browser.
It's best to read the wiki for desktop environments and display managers.
Enabling the display manager and network manager
Before we can use the DE, we need to enable the display manager SDDM, and the
network manager to handle network connections (no more dhclient!).
# systemctl enable sddm and # systemctl enable NetworkManager

Reboot once more.
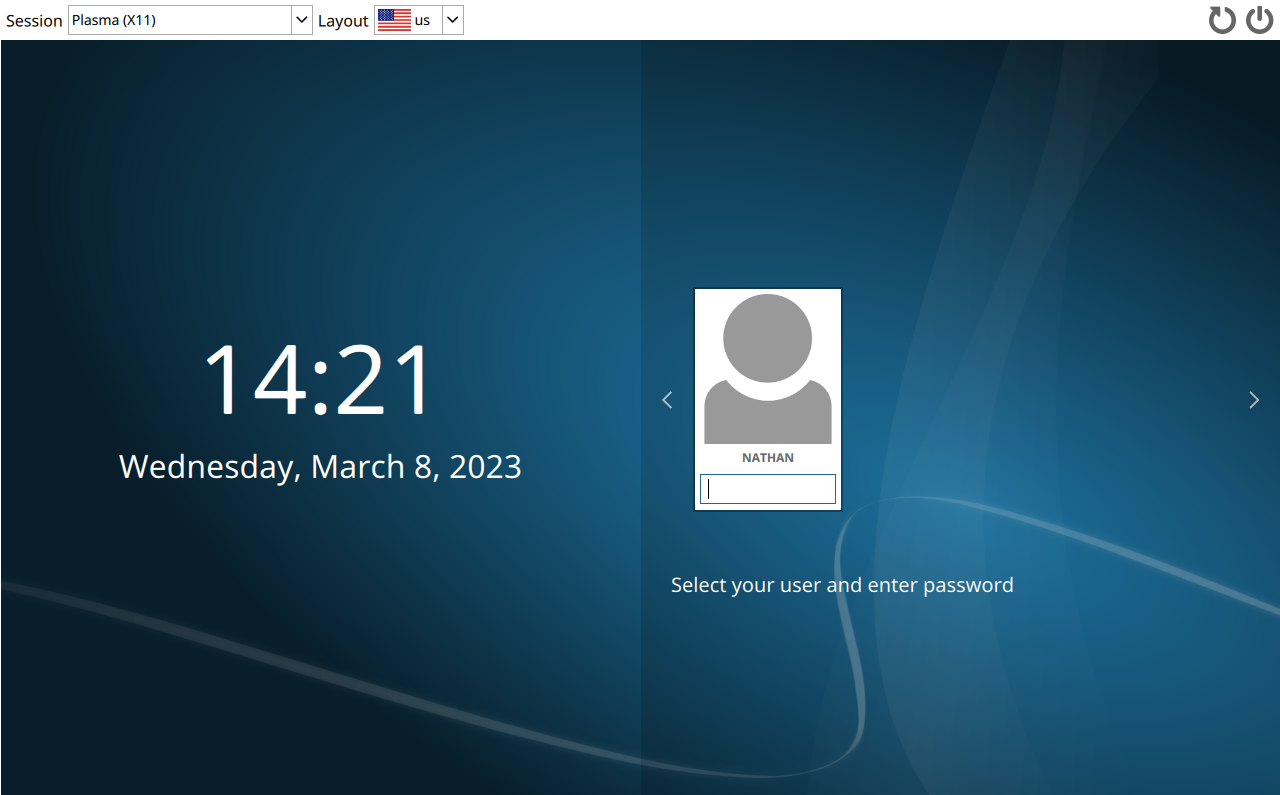
Welcome to KDE
If all is well, SDDM should start up after rebooting (and unlocking LUKS).
Login as the new normal user.
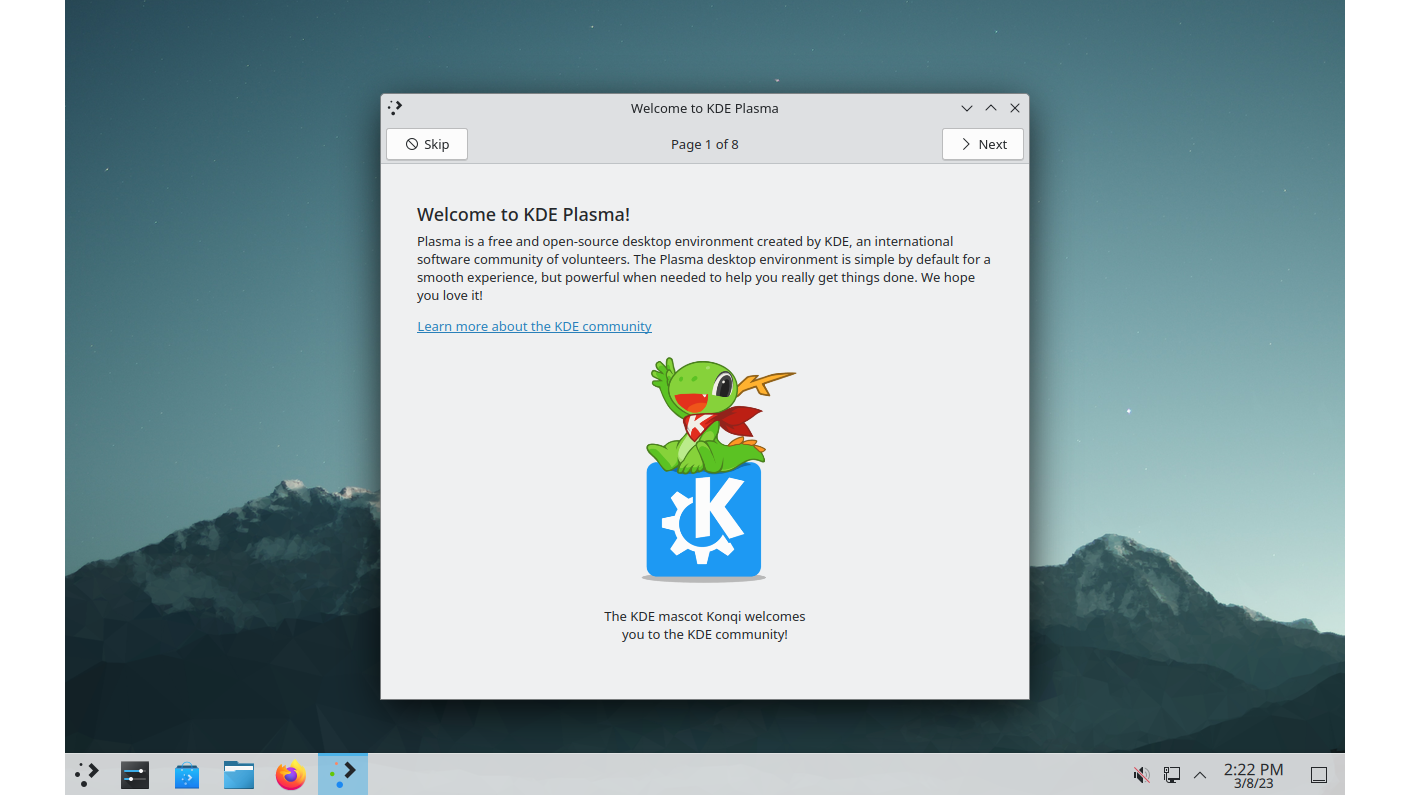
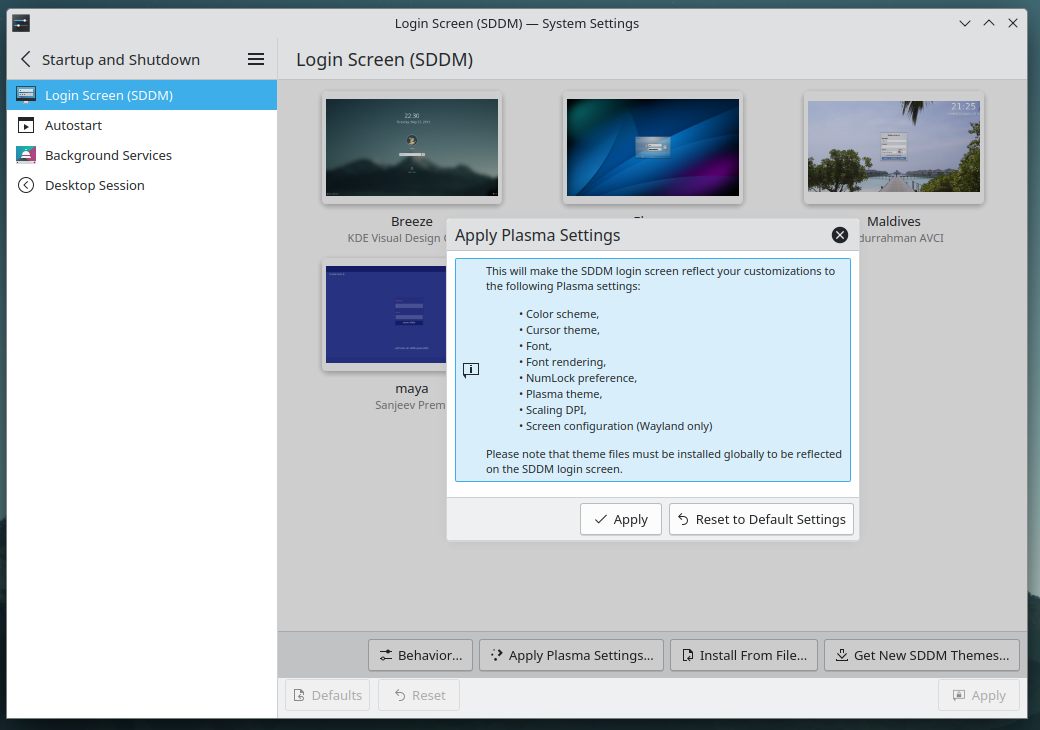
SDDM is unthemed by default. That's easily fixed in System Settings.
Select the theme you like, apply, then also 'Apply Plasma settings'.
Getting hibernation working
If hibernation isn't needed, you're done. Continue setting up the system how
you like. If you want hibernation, continue reading.
Editing mkinitcpio.conf, again.
I recommend, again, reading the Arch Wiki here.
Open up a terminal (Konsole for me). Root privileges will be needed. Either change
to root with $ su or $ sudo -s or just prefix everything with $ sudo.
Whatever you choose, open /etc/mkinitcpio.conf in a text editor of choice.
Add resume to the same place as before in HOOKS but after filesystems this time. Save and close the editor.
Editing /etc/default/grub, again.
The kernel also needs to know where to retrieve the saved hibernation state when
waking up. GRUB, of course, can provide this with the kernel options.
Again we need a UUID of a partition, this time of the mapped LUKS partition and
not the physical partition as before. Before this, we'll need the offset of the
swap file on the Btrfs filesystem. This can be retrieved as root with the following:
# btrfs inspect-internal map-swapfile -r /swap/swapfile
It's probably best to write down the output number, unless you can remember it.
Now the UUID is needed.
# blkid -o value /dev/mapper/root | head -n1
I'd just copy the output to my clipboard, now we have a GUI to use. Open /etc/default/grub
as before and append resume=UUID=<your mapped root UUID> resume_offset=<number you got>
to the kernel arguments like we did for the LUKS setup.
If all looks great, reboot the system one last time.
Now I have a Hibernate option in Plasma!

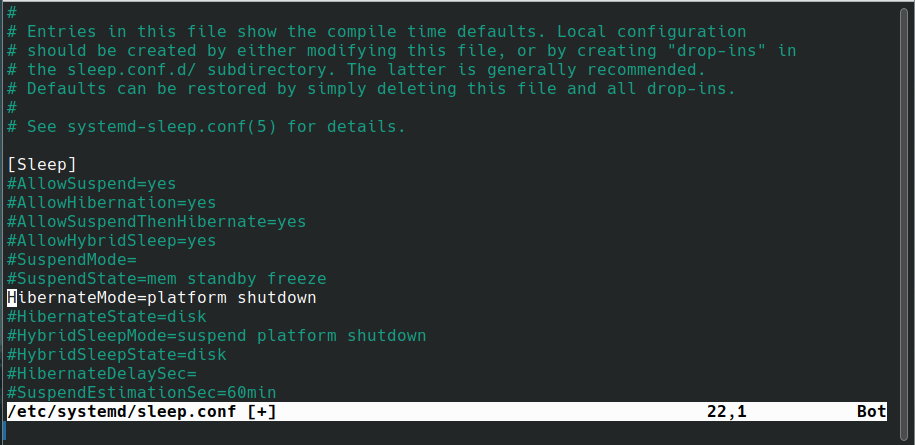
Go ahead and test it out. If the system doesn't fully shut off but reboots, try
the following: modify /etc/systemd/sleep.conf.
Uncommenting HibernateMode and removing platform so that it's
HibernateMode=shutdown will likely be enough to fix it. If that doesn't work,
it's possible your system firmware doesn't support hibernation. You'd need to consult help elsewhere in that case.
That's it!
No seriously, that's the end of this post. Hopefully it helps someone!
Please email me any suggestions or corrections.